If you’ve ever stood over a hydraulic motor assembly bench watching a new technician fumble with a seal, stretching it too tight or nicking the lip on a sharp housing edge, you know just how much a single $5 seal can derail an entire project. As a hydraulic motor parts supplier, I’ve seen this mistake hundreds of times over the last 12 years—projects delayed by weeks, field returns labeled “premature seal failure,” and clients out thousands of dollars in lost production because they skipped one small, critical step in the installation process. Hydraulic Motor Parts
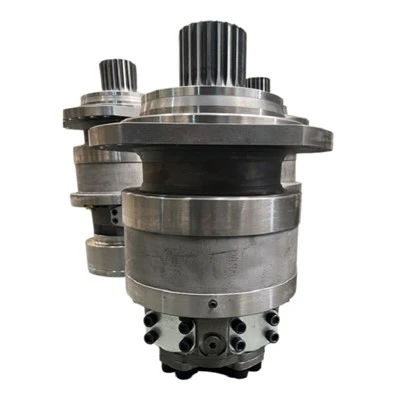
The truth is, hydraulic motor seal installation isn’t rocket science, but it’s also not something you can wing by grabbing a screwdriver and prying a seal into place. I’ve spent years working with our in-house engineers and field service teams to refine our installation guidance, because we know that even the highest-quality nitrile or polyurethane seals we supply won’t perform as advertised if they’re installed wrong. Today, I’m breaking down the step-by-step process we share with every client who buys seals from us, with real-world tips we’ve picked up fixing motors in the shop and on job sites across North America.
First, before you even touch a seal, you need to do your prep work—and this is where 80% of installation errors start. I can’t tell you how many times a mechanic will open a brand-new motor housing, see a little bit of grease or leftover metal shavings from the machining process, and grab a rag to wipe it down. That’s the wrong move. You don’t want any lint, metal, or debris on your hands or on the parts you’re working with, because even a tiny particle stuck under a seal lip will cause a leak in hours.
Start by laying out all your tools and parts on a clean, flat workbench. No grease-covered tools, no dirty shop rags, no tools left on the floor. I keep a dedicated “seal installation” tool set that only gets used for this job: a set of plastic installation drivers (different sizes for different seal diameters), a lint-free microfiber cloth, isopropyl alcohol, a small bottle of clean hydraulic fluid (not motor oil or general-purpose grease), and a set of feeler gauges to check housing tolerances. If you’re reusing any parts (we always recommend using new parts, but sometimes clients have old housings they need to work with), take 15 extra minutes to clean the seal bores and shafts thoroughly. Use isopropyl alcohol to wipe down every surface that the seal will touch, then dry it completely with the microfiber cloth. Don’t skip drying—any alcohol residue can mix with hydraulic fluid and break down the seal material over time.
Next, inspect every component that will come into contact with the new seal. Check the seal bore (the hole where the seal sits) for burrs or sharp edges from machining. A quick run of a deburring tool around the edge of the bore will fix this, but if the bore has a deep scratch or gouge, you don’t want to install a seal there—we stock bore repair kits for this exact reason, and we always tell clients to reach out to us if they have a damaged housing before they start assembling. Also check the seal lip and the shaft (the part that spins inside the seal) for any nicks or scratches. Even a tiny scratch the size of a human hair will cause a leak or excessive wear on the seal, so if you spot damage, don’t try to “work around it.” Use a new seal every time—cut corners here, and you’ll be back doing the job again in a week.
Now, you’re ready to handle the seal. This is the most delicate part of the process, because seal lips are thin and easy to damage. First, check the package your seal came in. Every seal we supply has a part number printed on it, and we’ll include a small diagram in the packaging showing which side is the “lip side” (the side that faces the hydraulic fluid, the side that creates the seal against pressure) and which is the “back side” (the flat side that sits against the housing). Never install the seal backwards—it’s the number one mistake we see from new technicians, and it renders the seal useless immediately. A backward seal won’t hold pressure, will leak, and will often blow out of the housing under load.
When handling the seal, never touch the lip with your bare hands. The oil and grease from your skin will break down the seal material over time, and the oils can even cause premature swelling or shrinking, depending on the seal compound. We always recommend wearing nitrile gloves when handling seals, not latex. Latex leaves residue that’s hard to get off, and it can react with certain seal compounds like polyurethane. If you do have to touch the seal, only touch the outer metal or rubber body, not the inner lip.
Before installing, lightly lubricate the seal lip and the shaft with clean hydraulic fluid. Don’t use heavy grease or general-purpose oil here—those can attract dirt and debris. The lubrication makes the seal slide into place easier, and it creates a thin barrier between the seal and the shaft that reduces wear when the motor starts running for the first time. Too much lubrication isn’t a problem, but don’t slather it on so much that it drips everywhere; a thin, even coat is all you need.
Now for the installation step itself. This is where a lot of technicians go wrong: they grab a screwdriver or a pry bar and push the seal into the housing. That’s a fast way to nick the lip or bend the seal, which causes leaks. The correct way is to use a plastic installation driver that’s the exact diameter of the seal’s outer body. Metal drivers can scratch the housing or the seal, so plastic or nylon drivers are the only tools we recommend for this job. If you don’t have a driver the right size, you can make one from a clean piece of PVC pipe that fits over the seal’s outer edge, but never use any metal tool to drive the seal into place.
Position the seal so the back side is facing the housing (remember, lip side faces the fluid), then line the driver up straight with the bore. Don’t angle the seal when you drive it in—if it’s at even a 15-degree angle, you’ll get an uneven seal that leaks. Apply even, steady pressure around the entire edge of the seal, not just one spot. Push the seal all the way in until it sits flush with the housing edge. How do you know it’s seated correctly? The top of the seal should be perfectly level with the housing’s surface, no higher and no lower. If it’s recessed, check the bore depth—some motors have specific depth requirements, and we include those specs in every seal part listing on our website, so you never have to guess.
Wait, there’s one more critical step for dynamic seals (the kind that move against a shaft, like the ones in most hydraulic motors): the shaft must be properly prepared. If you’re installing a seal on a new shaft, check that the shaft’s surface finish is between 16 and 32 microinches. A finish that’s too rough will wear the seal lip out fast, and a finish that’s too smooth will cause the seal to slip and fail. If you’re installing a seal on an old shaft, take a rag and run it along the shaft to check for any burrs or wear grooves. If there’s a groove in the shaft where the old seal sat, you’ll need to repair the shaft or replace it before installing a new seal—we offer shaft repair sleeves that fix this exact issue, so you don’t have to buy a whole new motor housing.
I learned a lot of these tips the hard way, early in my career. When I first started working at our hydraulic motor parts shop 12 years ago, I installed a seal on a client’s wheel motor, used a screwdriver instead of a plastic driver, and nicked the lip. The motor ran for two days, then started leaking so bad the job site had to shut down, costing the client over $15,000 in downtime. That mistake turned me into a stickler for following the correct installation process, and it’s why we now include a full installation guide with every seal we ship, and offer free technical support to every client who needs help with their assembly.
Another common mistake we see is over-tightening the bolts when reassembling the motor. If you’re installing a seal on a motor end cap, make sure you torque the bolts to the manufacturer’s specifications. Too much torque will warp the end cap, bend the shaft, and crush the seal, causing immediate failure. Too little torque, and the end cap will move under pressure, leading to leaks. We print the torque specs on every motor part we sell, so you don’t have to look them up.
Once you’ve installed the seal and reassembled the motor, do a quick pressure test before putting it back on the machine. Run the motor at low pressure for 10 minutes, then check for leaks around the seal. If you see any seepage, don’t panic—sometimes it’s just excess fluid that drained into the seal during installation. But if you see a steady stream of fluid, you need to take the motor apart and check the seal. Most of the time, it’s a misaligned or damaged seal, not a bad part, so don’t assume you need to buy a new one.
At the end of the day, correct seal installation is all about patience and attention to detail. I’ve seen mechanics install seals correctly on a broken-down motor in the middle of a job site, using just their dedicated tools and our on-site guidance, and I’ve seen techs install a seal wrong on a brand-new motor in a clean shop, all because they skipped one small step. The seals we supply are made from high-quality materials designed to last thousands of hours under pressure, but they can only do their job if you install them right.
If you’re working on a hydraulic motor and need help with seal installation, or if you need replacement seals, housing parts, or repair kits for your project, we’re here to help. Our team has decades of experience working with hydraulic motors of all sizes, and we can walk you through every step of the installation process, answer your questions, and make sure you get the right parts for the job.

If you have questions about seal installation, need help finding the right seals for your hydraulic motor, or want to place an order, reach out to our team to discuss your project.
References
NHM Hydraulic Motor Hydraulic Seals: Installation Best Practices for Longevity, Fluid Power Journal, 2021
Recommended Installation Methods for Rotary Seals, Parker Hannifin Seal Group, 2022
Hydraulic Motor Seal Failure Analysis: Common Causes and Solutions, Eaton Industrial Hydraulics, 2020
Ningbo Oushijie Hydraulic Transmission Co., Ltd.
Ningbo Oushijie Hydraulic Transmission Co., Ltd. is one of the most professional hydraulic motor parts manufacturers and suppliers in China, also supports customized service. With abundant experience, we warmly welcome you to wholesale durable hydraulic motor parts at competitive price from our factory.
Address: Changshi Sanxing Industrial Zone, Jiulong Lake Town, Zhenhai District, Ningbo,Zhejiang, China
E-mail: yong@nbosj.com
WebSite: https://www.nbosj.com/
