If you’ve ever stared at a pile of 1/35 scale tank parts, a 1/72 aircraft cockpit, or the tiny, delicate decals for a 1/100 ship and wondered why your last glue job left you with a gaping seam, a warped fuselage, or a part that fell off before the primer was even dry, you’re not alone. As a scale model supplier who’s spent 12 years talking to hobbyists—from 12-year-olds building their first Lego-adjacent historical plane to professional model makers creating museum-quality replicas—I’ve learned that picking the right glue is half the battle of a solid build. Not all model glue is created equal, and using the wrong one can turn a fun hobby project into a frustrating mess. Let’s break down the most common types, when to use each, and what I always recommend to my customers who come to me stressed about their next glue purchase. Scale Model

First, let’s start with the most iconic and widely used model glue: plastic cement. If you’ve ever picked up a basic model kit at a big-box store, this is the tube that came tucked in the box (or often, not tucked in, leaving you digging in the bottom of the kit bag). Plastic cement works on polystyrene, the cheap, lightweight plastic that makes up 99% of injection-molded scale model kits—think Airfix, Tamiya, Revell, and most smaller hobby brands. How does it work, you ask? Unlike regular glue that bonds two surfaces with a sticky filler, plastic cement actually melts the surfaces of the polystyrene where you apply it. When you press the two pieces together, the melted plastic molecules blend, and when the solvent in the cement evaporates, you’re left with a single, solid piece of plastic, not two pieces held together by a thin line of adhesive. That’s why it’s so strong—when applied correctly, the seam becomes almost invisible, like it never was there.
But here’s the thing about plastic cement: it’s not one-size-fits-all. There are two main formulations for plastic cement, and they’re designed for different jobs. First is thin plastic cement, often sold as “liquid cement.” This is the stuff with a fine metal needle nozzle, perfect for getting into tiny gaps between small parts—like the wing roots of an aircraft, or the tiny struts on a model car. It flows smoothly, so it seeps into the seam effortlessly, and it sets pretty fast, usually in 10 to 15 minutes, with a full cure in a few hours. I always tell customers who are building a 1/48 fighter jet, where a misaligned wing can ruin the whole look, to go with thin plastic cement for those small, precision parts. The downside? It can warp thin plastic if you apply too much, especially on delicate parts like canopy frames or tail fins. That’s where thick plastic cement, or “gap-filling cement,” comes in. As the name suggests, this is a thicker, more gel-like formula that doesn’t flow as much, so it’s great for filling small gaps between larger, less delicate parts. It sets a little slower than thin cement, usually around 20 to 30 minutes, so you have more time to adjust the alignment of a tank hull or a ship’s hull sections before it sets. I recommend gap-filling cement for joining major subassemblies, like attaching a car’s chassis to its body, because it gives you a little leeway to fix a tiny misalignment without the whole part locking into place crookedly. The only big caveat with any plastic cement is that you should never use it on non-polystyrene parts—like resin, metal, or photo-etched brass. That’s a mistake I see beginners make all the time: they grab their plastic cement from the last kit, slather it on a resin detail part, and wonder why it leaves a sticky residue that won’t dry.
Next up, a category of glue that’s exploded in popularity over the last 10 years thanks to the rise of more advanced model kits: cyanoacrylate adhesives, better known as CA glue or super glue. Most hobbyists know CA glue as the clear, fast-drying stuff that comes in tiny tubes, and for good reason—it’s incredibly strong, bonds to almost anything, and works on materials plastic cement can’t. It’s perfect for resin parts, photo-etched brass, metal, wood, even hard plastic that’s not polystyrene, like the clear acrylic canopies on some high-end aircraft kits. But CA glue isn’t either, either. There are multiple viscosities (thicknesses) and specialty formulations, each for a different job.
Thin CA glue, often called “liquid super glue,” is the workhorse of CA glues for scale modeling. It’s as thin as water, so it seeps into microscopic gaps between parts, which is why it’s ideal for small, hard-to-reach joins—like attaching photo-etched brass rivets to a model ship’s hull, or bonding tiny resin detail parts to a car’s engine. What’s great about thin CA is that it cures almost instantly when it touches a surface, and if you have a gap that’s a little too big for the thin glue to fill, you can use a trick every experienced model maker knows: baking soda. Sprinkle a tiny bit of baking soda into the gap after applying a drop of thin CA, and it creates a hard, durable filler that’s way stronger than regular CA alone. I sell a lot of thin CA and baking soda together in our “detail repair kits” for beginners, because it’s such a simple, effective trick for fixing small gaps without having to sand and fill.
Then there’s medium CA and thick CA, which are thicker, gel-like formulas. Thick CA is perfect for gap filling on larger non-polystyrene parts, like bonding two resin hull sections together, because it doesn’t run or drip, so you can apply it to a vertical surface without it sliding down before it cures. Medium CA is the middle ground, good for general-purpose bonding where you need a little more strength than plastic cement but more control than thin CA. The big thing to know about CA glue is that it’s not as forgiving as plastic cement. If you get a drop on your fingers, it will bond your skin together before you can even grab a paper towel—so I always recommend customers work in a well-ventilated area, wear nitrile gloves, and have a bit of acetone on hand to remove any accidental glue smudges before they cure. Also, CA glue is brittle compared to plastic cement, so it’s not the best choice for parts that will be handled a lot, like the opening hood of a model car that you’ll be popping open and closed for display. For that, you want something more flexible.
Which brings us to the third category of glue that’s a staple for intermediate and advanced model builders: epoxy. Epoxy is a two-part adhesive, meaning you mix a resin and a hardener in equal parts (by volume, usually) before applying it. It’s incredibly strong, flexible, waterproof, and resistant to temperature changes—way more durable than either plastic cement or CA glue. That makes it perfect for structural joins in large models, dioramas, or parts that will see a lot of handling, like the chassis of a 1/25 model car that you want to display with moving wheels. Epoxy works on every material used in scale modeling: plastic, resin, metal, wood, even glass for diorama windows. It also has another huge benefit: it fills large gaps, up to several millimeters, with no shrinkage, so you don’t have to use additional putty to fix a big seam.
But epoxy isn’t without its downsides. First, it takes a lot longer to cure—most epoxies have a working time of 5 to 30 minutes, depending on the type, and a full cure time of 24 hours. That means you can’t adjust parts after you mix the glue, so you have to measure carefully and work quickly. If you mix too much, you’ll be left with a puddle of unused epoxy that’s useless once it hardens. Second, it’s messy. If it gets on your workbench, it’s nearly impossible to remove once it cures, and it will stick to anything it touches. For that reason, I always tell customers to work on a disposable surface, like a piece of cardboard or a silicone mat, when using epoxy. There are different types of epoxy for modeling, too: slow-cure epoxy for large builds where you need time to align parts, fast-cure epoxy for small detail work, and even flexible epoxy for diorama elements like tree branches or figure bases.
The fourth category of glue that’s super important, especially for beginners and anyone working with decals or delicate parts: white glue, also called PVA glue. Wait, I know what you’re thinking—white glue is for school projects, right? Why would you use it for a scale model? Because it’s perfect for jobs where you need flexibility and repositionability. PVA glue is water-based, non-toxic, easy to clean up, and it dries clear. That makes it ideal for attaching decals to your model—wait, no, not just decals. Wait, actually, a lot of beginners think you need special decal glue, but white glue thinned with water works just as well, and it’s way cheaper. It’s also great for diorama building: attaching paper terrain, fabric grass, or small model figures to a base, because it’s flexible enough to move with those materials, unlike the more rigid glues we talked about earlier. The only downside is that it’s not strong enough for structural joins. You’d never use white glue to bond two tank hull parts together, because it will pull apart with even gentle pressure. But for dioramas, decals, and small, lightweight parts, it’s the perfect, budget-friendly option.
I’d be remiss if I didn’t mention a couple of specialty glues that have gained a loyal following among advanced modelers in recent years. First, solvent-based adhesive for resin and 3D-printed parts. 3D-printed models, especially those made from PLA or resin, don’t work well with plastic cement or CA glue for large joins. Solvent adhesive for 3D printed parts works similarly to plastic cement, melting the surface of the print to create a seamless bond, but it’s formulated not to damage the porous plastic of 3D prints. A lot of our customers who build 3D printed model tanks or aircraft swear by this stuff, because it creates seams that are almost impossible to see, even after sanding and priming.
The other specialty glue is model cement for photo-etched brass. Photo-etched parts are thin, delicate pieces of brass used for things like railings, instrument panels, or antennae on models, and regular glues often leave messy residue or don’t adhere well. There’s a special liquid cement for photo-etched brass, usually a type of CA glue formulated not to leave smudges or warp the thin metal, that’s a staple for anyone building high-detail models. I always keep a small bottle of this in my shop for customers who are working on 1/700 scale warships, where the photo-etched railings are less than a millimeter thick.
Now, I know all of this can be overwhelming, especially if you’re just starting out with scale modeling. That’s why I always remind my customers that the best glue isn’t the most expensive one—it’s the one that matches the job. Let’s do a quick cheat sheet to make sure you don’t make a mistake: for joining polystyrene kit parts, use thin plastic cement for small, precision joins, gap-filling plastic cement for large subassemblies. For resin, metal, or 3D printed parts, use CA glue (thin for details, thick for gaps). For structural joins that need durability, use epoxy. For dioramas, decals, and lightweight parts, use white PVA glue. For photo-etched brass, use specialty photo-etched cement.
No matter what type of modeling glue you’re using, there are a few universal tips I always pass along to avoid common mistakes. First, test any glue on a spare piece of the same material before using it on your actual model. That way, you can make sure it doesn’t warp, discolor, or leave a residue. Second, work in a well-ventilated area—most modeling glues have strong fumes that can be harmful if you breathe them in for long periods. Third, take your time. Rushing a glue job is how you end up with a crookedly aligned wing, a seam that won’t sand smooth, or a part that falls off a week later. If you need more time to adjust parts, use a slower-curing glue, don’t force it.
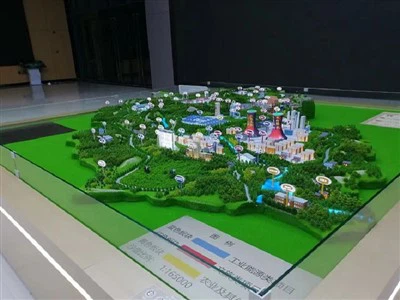
If you’re looking to stock up on the right glue for your next build, or if you have questions about which type is best for a specific project, our team is here to help. We carry all the types of glue I’ve talked about here, plus specialty products for advanced builders, and we can help you pick the right products for your skill level and project size. Don’t hesitate to reach out to our team to discuss your needs—whether you’re a beginner building your first Airfix kit or an advanced modeler working on a custom 1/32 scale fighter jet, we’ve got the glue that will get your project looking its best.
Industrial Model References
- Model Maker’s Guide to Adhesives. Scale Modeling Magazine, 2021.
- Cyanoacrylate Glues for Precision Model Building. Hobby Industry Association, 2019.
- Epoxy Adhesives for Structural Model Assembly. Journal of Scale Modeling Technology, 2022.
- Solvent-Based Adhesives for 3D Printed Model Kits. 3D Printing for Hobbyists Quarterly, 2023.
Guangzhou Zonco Culture and Media Co., Ltd.
Guangzhou Zonco Culture and Media Co., Ltd. is one of the most reliable scale model manufacturers and suppliers in China, also supports customized service with low price. We warmly welcome you to wholesale cheap scale model from our factory. For quotation, contact us now.
Address: Room C371, 402, Building 6, No.3 Xintang Street, Tianhe District, Guangzhou
E-mail: 13123180052@163.com
WebSite: https://www.scalemodellab.com/
